Now that you are all set with your very own home-grown scoby, it’s time to start brewing kombucha tea. This first step is to brew some regular sweet tea and then ferment it.
What you need
- water
- 1 gallon glass jar*, very clean
- 2 cups white sugar
- 8 bags of black tea
- 2 cups of mother-brewing liquid (or store-bought kombucha)
- 1 scoby
- a tea towel and elastic
*I bought this one from amazon.ca because it has a spigot at the bottom for easy pouring.
What you do
- Measure out a bit less than a gallon by filling your jar to about 80% with water. Pour the water in a large pot and bring to a boil.
- Stir in the sugar, then drop in the tea bags.
- After about 10 minutes (longer for stronger tea), remove the tea bags and allow the tea to completely cool.
- Sir in the kombucha liquid, then pour the whole thing into your jar.
- With a clean hand, slide in the scoby so she floats at the top of the jar (it’s okay if she tilts or sinks a little).
- Cover with a cloth and seal with the rubber band. Store in a cool dry place out of direct sunlight where it will not get jostled.
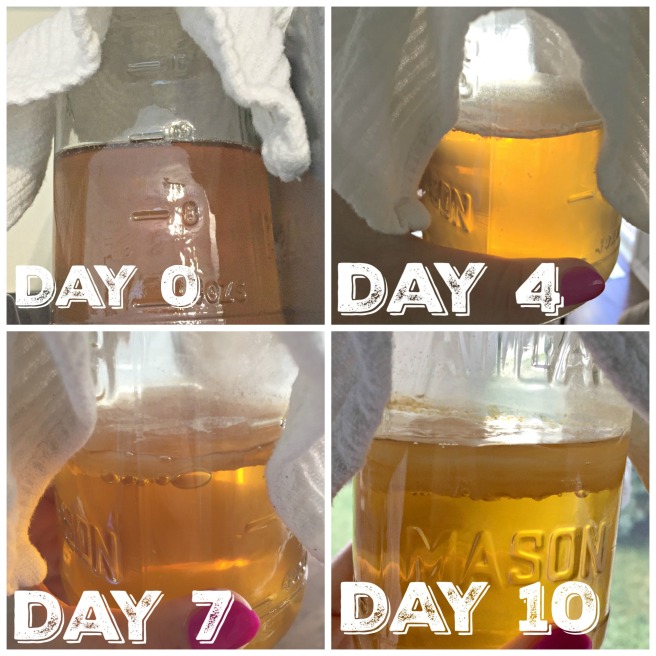
- Wait (watch how your little mother grows!) and start tasting your tea after 7 days. The tea will go from sweet to tart as it ferments, so find a balance that pleases you.
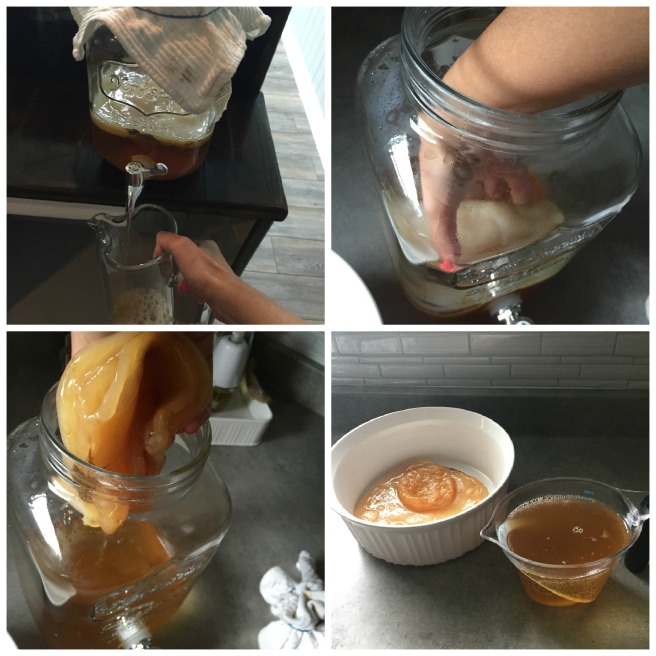
- Pour out your kombucha into a clean glass pitcher. Reserve 2 cups of the liquid to start your next batch
- With clean hands, remove the mother and park her on a clean plate. If she is getting very thick, you can remove a bottom layer.
- To start the next batch of kombucha, clean out your fermenting jar and go back to step 1.
The next step in making your first batch of tea is to add flavouring. The good news is that this second fermentation only takes a few days.
What you need
- seal-able glass or plastic vessels
- flavouring*
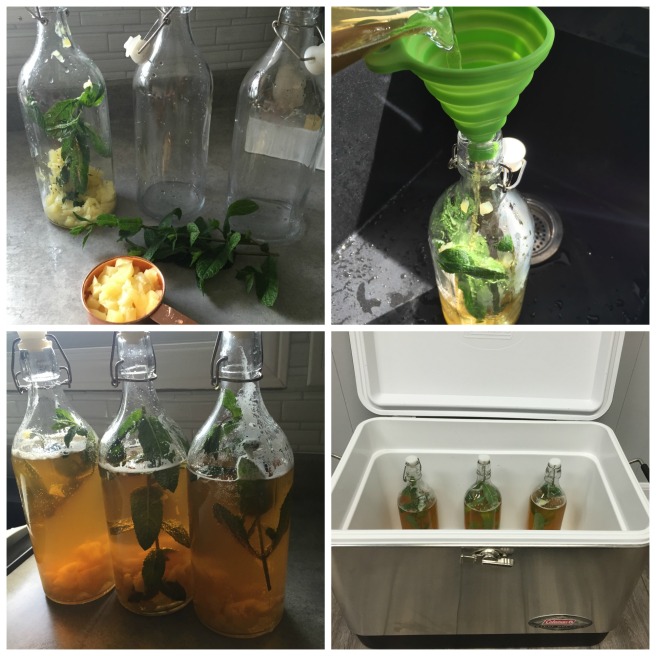
*There are really no wrong answers here. Flavour the tea with whatever fruits and/or herbs you have on hand or fancy at the time. I had some pineapple in the fridge and some mint in the garden. It sounded like a good summertime combo. I’m calling it the piña komjito. TM .
What you do
- Cut up the fruit very finely, something between a dice and a mince. The larger the surface area, the more yummy flavour will steep into the tea.
- Add about 2 cups of flavouring to the gallon of tea and seal.
- If using glass bottles or jars, it’s a good idea to contain them in a cooler or other bin. If too much carbonation happens too quickly, there is a chance the glass will shatter.
- Wait 1 to 3 days for the flavour to infuse.
Only one more step to go! In a few days you will be drinking your delicious home made kombucha. The third and final step is to carbonate the tea.
What you need
- seal-able glass or plastic drinking vessels
- a strainer
What you do
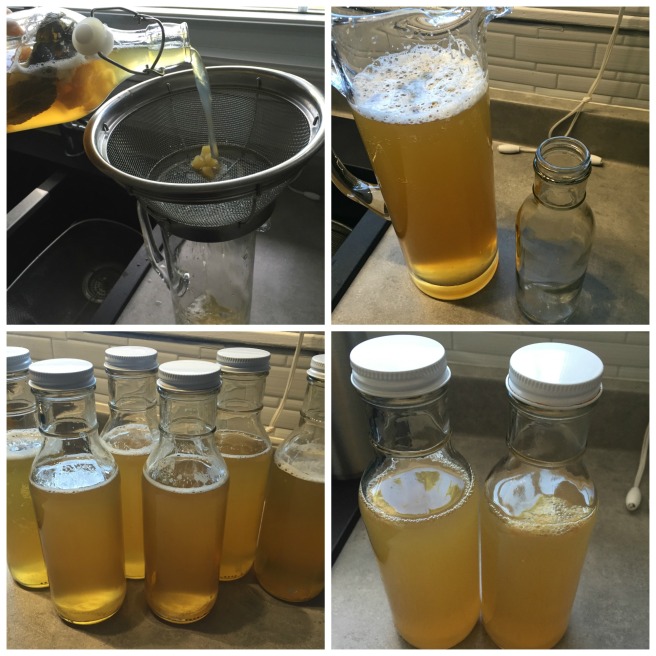
- Strain your kombucha to separate it from the flavouring agents.
- Pour into bottles (these can be the same one you used for the second ferment -just washed out- or smaller serving sized containers) and seal.
- Again, if using glass, place in a cooler to contain possible explosions.
- Wait 1 to 3 days to build up carbonation.
- A baby scoby may form on the surface (just like when we made our own mother!). Just scoop out and discard.
That’s it! The kombucha is ready to drink. Keep the bottles in the fridge (to stop further fermentation) and consume within a month.
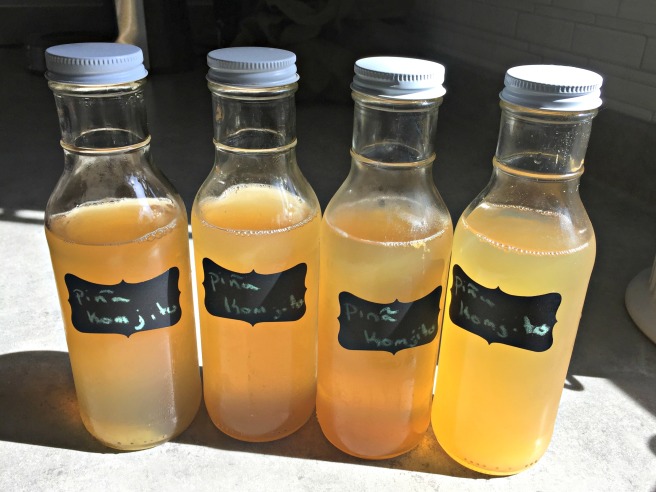

So far Liam and I are loving having our own almost-limitless source of kombucha; although we are restricting ourselves to half a bottle a day each. We haven’t been buying any from the store as ours is just as good, much less expensive, and (surprisingly) simple to make! For the next batch I will play around for a few different flavours so that we have some variety at home too.
I hope you enjoyed following along while I chronicled my kombucha journey. If you are not inspired to get your own symbiotic colony of bacteria and yeast working for you at home, maybe you’re at least more likely to give a store-bough bottle a try. I guarantee your tummies and your taste buds will thank you. Happy brewing!
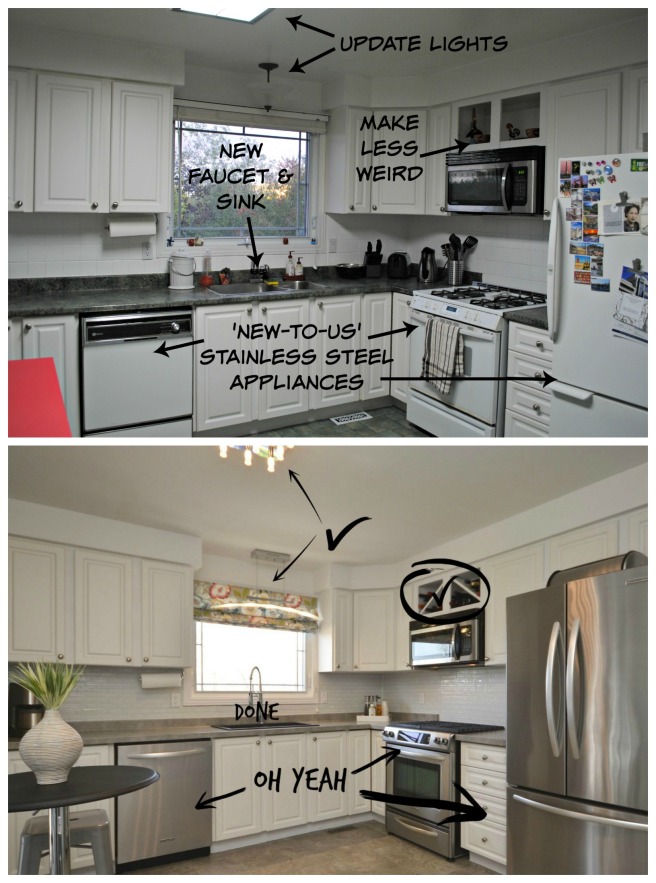
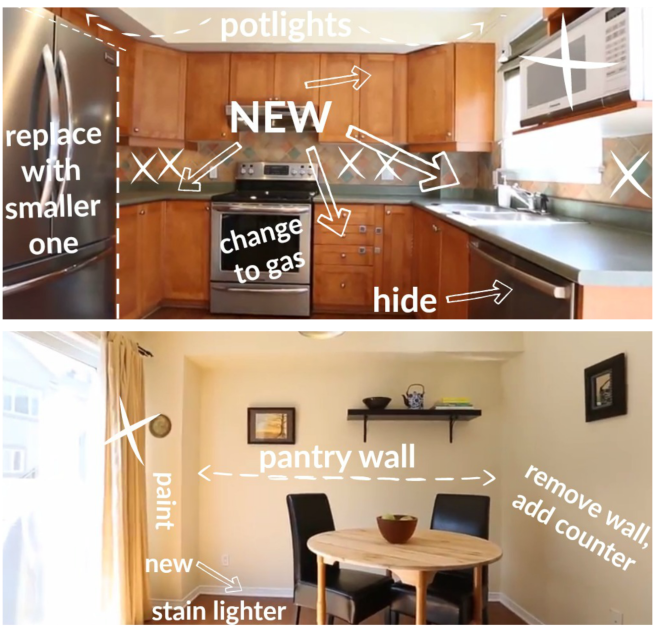 The kitchen is basically a gut-job. It photographs well, but trust me when I tell you that it’s all looking pretty warn. The refrigerator is too large and blocking access to a light switch, so I’d like to replace it with a counter-depth unit that is more size appropriate. At the same time, I want to upgrade the stove for a gas range and go with a hidden dishwasher for a streamlined look. The cabinets, counters, fixtures, and back-splash will also be new.


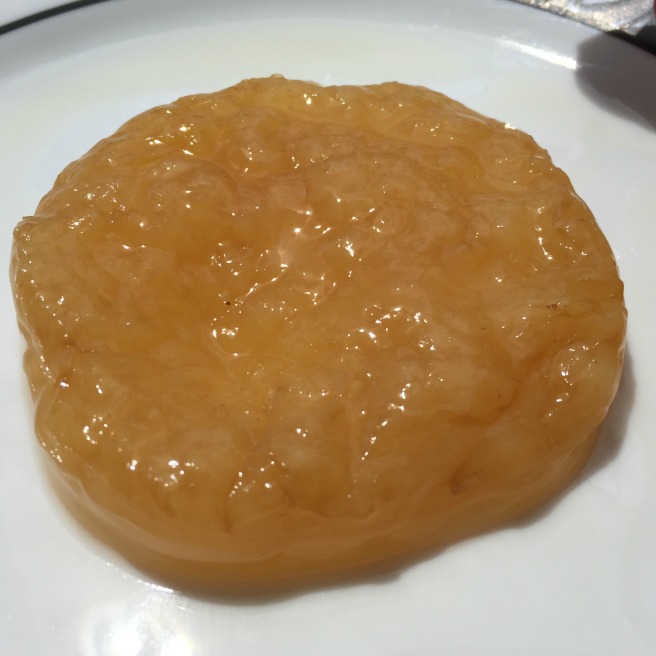
 And just like that, I have my very own kombucha Mother! This little scoby is going to make me a whole lot of delicious bubbly healthy goodness. All it will take is a bit more time, tea, and a plethora of microbial fermentation, oxidation, and cellulose synthesis reactions! … I mean *magic*.
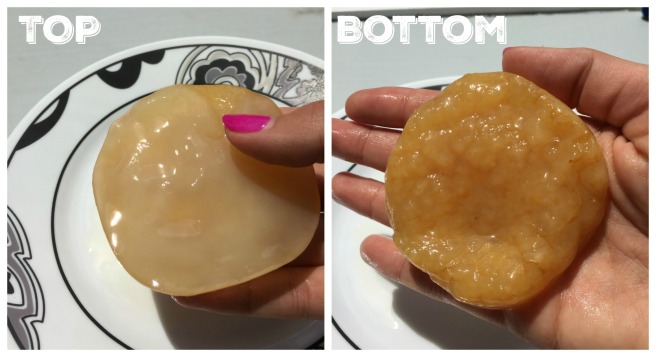


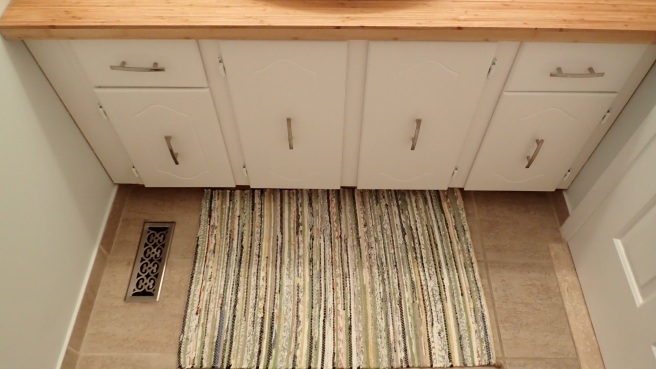
 The green linoleum floor got a quick coat of primer and then 12″x 24″ Allure vinyl tiles placed over it. I was very pleased with how well the floor project went; the peel-and-stick installation process was a breeze! The tiles being grout-able meant that the resulting floor looks almost like real tile, just much softer and forgiving. I can drop almost anything and it wont break. It is however easier to scratch, so be extremely careful moving heavy things across it (like refrigerators!). Also, don’t slop a bucket of water over it when washing. Water sitting in between the tiles will tend to discolour the grout. Just dry it a titch after washing, or use a steam mop.


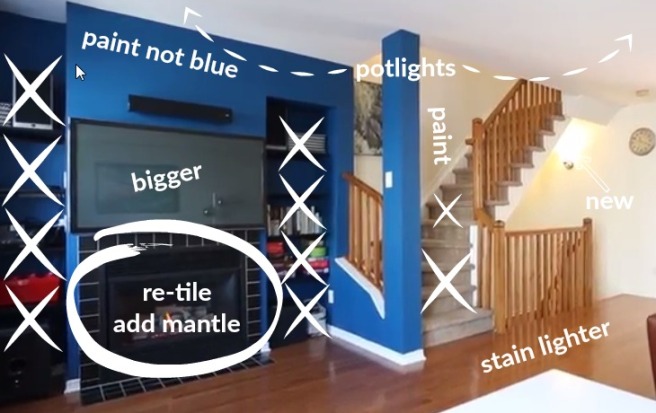
 The project is about 30% done at the moment and we estimate it will make the house look 3000% better. But you won’t see more until it’s completely finished for the big reveal. For now enjoy these sneak-peaks of the new room colours (grey, what else?) which already make everything look so much nicer in spite of the mess. It’s not easy living with everything literally turned out and upside down, but there are moments of joy in the novelty and deep down we know it will all be totally worth it.


 See
See 