As featured on:

I have wanted rain-barrels forever. They make so much sense! Why waste clean drinking water on plants and grass? Why pay for something that is free?
I like free.
But as they say, you have to spend money to make save money, so when the opportunity came up to buy a pair of old white-oak whiskey barrels off some guy on Kijiji, I didn’t pass it up.
Here they are, delivered for $200.

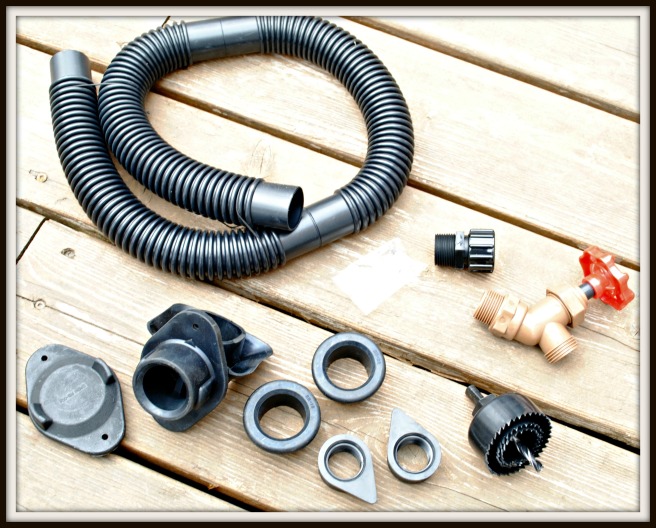
To turn the whiskey barrels into rain barrels, I also had to buy two Earth Minded DIY Rain Barrel kits from the BEST store on the planet, Canadian Tire. They were $30 each.
 The kit includes everything you need to make the rain barrel; hoses, spigot, rubber gaskets, even the hole saws. The only tools we needed were an electric drill, a leveller, measuring tape, a long screw (important!), a pencil, work gloves and safety glasses.
The barrels need to be placed within 3 feet of a down spout on a level surface. We had some old pavers lying around and used those to set the barrels on.
The kit came with detailed instructions, and we also found this video very helpful.
One snag in the process was that the wood of our barrel was thicker than the hole saws were deep. Liam figured out a solution fairly quickly. Just saw as far as you can in the wood and stop. Insert your long screw into the drill hole so it gets a good grip, then twist and pull. The whiskey-soaked wood should splinter easily releasing a large layer. Go back with the whole saw and cut in the rest of the way.
Last year Ottawa experienced a drought for much of the summer. We were told to stop watering our lawns and gardens. Then there was a rash of house fires caused by the extremely dry conditions of people’s lawns, and we were told to start watering again! This year I will be prepared with gallons of stored rain water to partial out during the hot dry days.
Plastic barrels can of course be purchased in garden centres everywhere, but these don’t always look great and aren’t cheap either. For $130 a piece and one afternoons work, I am very pleased with the aesthetic of my barrels. They add character and history to my yard while helping to simultaneously save a precious resource … and on my water bill!


I’m excited to make my rain barrel, thanks for sharing your experience! So the only thing I’m not sure about is that I’ve read that a barrel is typically 1″ thick. The seals and spigot in the Earth-Minded kit say they’re 3/4″ thick. Did the seals span the entire thickness of your barrel wall? Do you know if your barrels are 1″ thick? Thanks for any info you can share!
Not sure of the barrel thickness … an inch sounds about right. But the spigot in the Earth Minded kit fit snugly and do not leak!and snugg
what about the smell of whiskey that is soaked into the wood? Does it not get into the water and maybe kill the plants?.
There was absolutely a bit of an whiskey smell to the water (yummy) at first. No negative effects on the plants though.
I there something in the kit which diverts the water to the barrel and/or which you can shut if the barrel fills up and it continues to rain?
The kit comes with a diverter that re-directs some of the water flowing through your down spout into the barrel. Once full, the water will level out with the diverter and simply pass through the down spout like normal. You don’t have to do anything! So easy.
Love it!
I USE MY RAIN BARRELS FOR GIVING WATER TO MY ANIMAL IS THIS WHISKEY BARREL SAFE TO GIVE THE WATER TO ANIMALS
Yes, they will love the taste of the water. It will even get them slightly intoxicated!